React Part 1
Today we start something new, we are going to talk about how to actually start a react app. Basically what files come with the installation and how to run it on the browser.
This is going to be a react series, starting from complete scratch. Will be leaving links down below as they come available for more helpful tips. I like to explain things very simply and to the point.
I imagine trying to explain this kind of information to my one-year-old son. Ok, moving on!
What is React?
It is a Javascript library used to create interactive websites, allowing us to create single-page applications easily. When we say a single page application, we mean the server only has to send a single HTML to the browser for it to run. Then react takes over. We can click and do all our fun stuff without a “send back call” to the server(The back and forth process), which results in our site’s load and run faster for the user.
How to start?
First, we start with bringing up VS CODE(if you don't have vscode here is a link to set it up, here) or any code editor of your liking.
Fun fact: when you start up VSCode if you hit control and back tick ` it will bring up the terminal for you.
Ensure that you have a node package installed (anything higher than 5.2); you can check by typing in node -v in the terminal. If not, hop over here to install it.
After that, we have to create/get into a file we want our project to hang out(name it whatever, I used react-medium-project).
Tips for terminal: if you type in cd *filename* in your terminal you will go into that file.
Also as you start typing after the cd, hit the tab button and it will auto-fill for you.
If you don't know where you are, type in ls and it will show you where you are.
You can also go back in a file by using cd .. (yes, with space and the two dots ..)
Ok moving on to actually getting started, we type in this command npx create-react-app *name-of-project*, press enter
If a warning comes up looking like this

Just uninstall it with npm uninstall -g create-react-app
then run code again: npx create-react-app *name-of-project*
It will load up everything you need to get your app up and running. When it is complete the text should say something like “Happy hacking!”
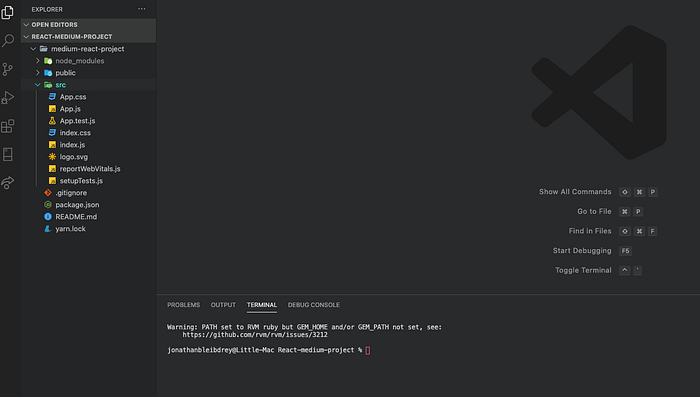
Now ls to see where you are, and cd into your project name you just created and run npm start. (down below is what you should see in the terminal)

A browser window should pop up as well, Pay attention to where it says localhost: somenumber (usually 3000) that's where your site is running

If that doesn't work, then just type in localhost:3000 in the browser, and if you still don't have that, you messed up somewhere. Go back into your terminal to check if there is an error message.
Moving on!
We can also open our project a different way, with the open folder from the left side of the code editor. Click on the open folder and find the folder you just created in your finder. then click open, simple.
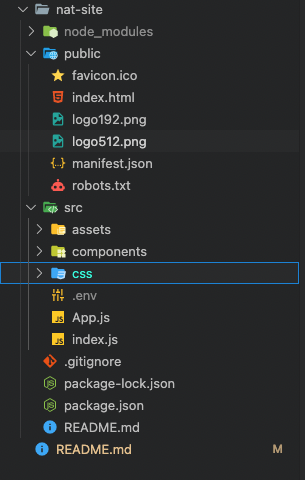
Moving on, you now should see all these files on the side of your code editor.
The first one says node_modules don't ever go into or mess around in here, unless you know what you're doing. Basically any node packages we need to use in react, live in this folder. If for some reason it is not there, just run npm install in the terminal and it will reload from your package.json.
Down below is more or less what it will look like, I did add some things to it, so do don't expect it to look identical.
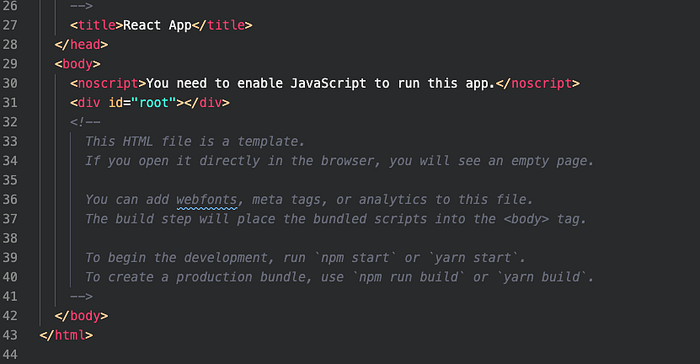
The next file is named public and we hang out here to put photo files or checking out the index.html file, which is an important file. This is where everything public is shown to the browser. This is the one and only HTML file that is served to the browser, and all our react code is injected into this one file. You will not come in here too often, but the most important part of this is the div with the id=” root.” that's how we get react to imprint itself onto the browser, through this single div.
Everything else in the public folder is just PNG/ico photos for basic template react startup, A JSON folder, and robots.txt. Just leave them alone until you get the hang of things.
Now into the good stuff! 95% of your work will be done here in the src folder. Here we have CSS files, js files, and test files.
Up above in the source it's common to have an assets file, which is just a holder for images, and files. A component's file is where you put all your javascript file. Lastly the CSS file is obviously for all your CSS files.
After that, we have a:
gitignore file-This is where we store files or anything important we don't want to push to Github.
Package JSON file-This holds all the dependencies for the applications. (also don't go into here, unless you know what you're doing.)
readme file-This is simply a good place to keep your thoughts about your website, the name of your project, what it does, and how to make it run.
Starting off, you will be most likely just using javascript “.js files” and/or CSS “.css files”.
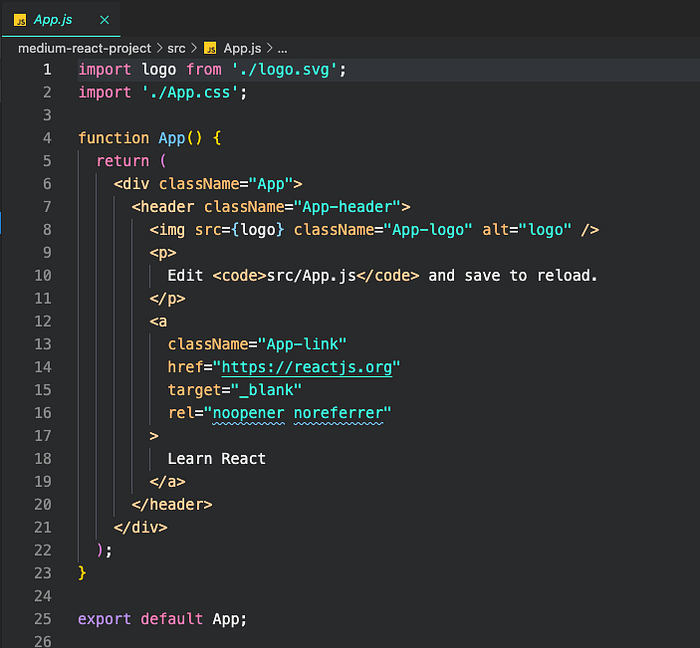
Above we have the standard App.js file, and This is like a home base for everything. This is where we attach all our components for everything, since this folder is attached to an index.js folder, and that is attached to the HTML index file(Don't really need to know that till later on). This is what a component looks like as well. We will explain more of this later.
Moving on!
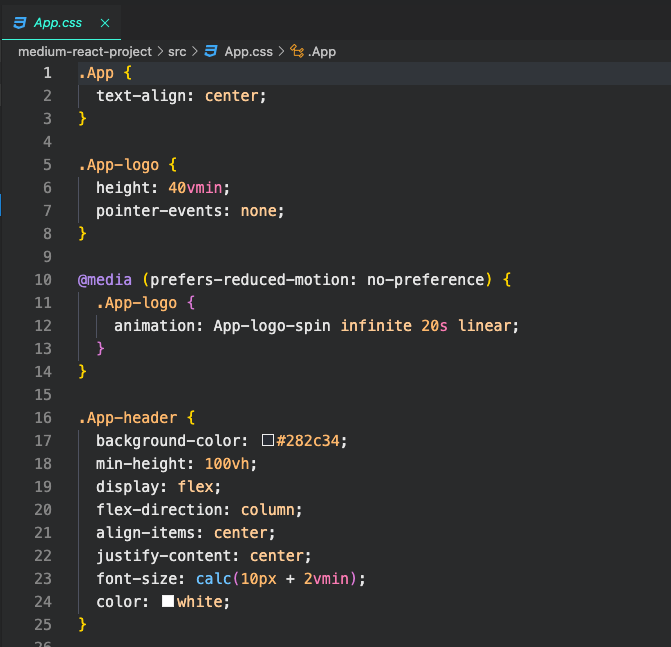
Above is a basic CSS folder; it's where most of your styling goes for your website. If you want to learn more about styling, you can learn here .
The last folder I want to talk about is the index.js we rarely go and change anything in this folder. This is where we attach the div id=” root” to React.
The React.strictMode surrounding <App/> gives us guidelines almost, like little warnings in the console, A helper when something isn't working out.
you don't really play around in here too often.

Now I want to go over the App.js file and everything inside it briefly.
Starting from the top, we have the import section, here we import anything we wanted to be used or shown in this particular component. examples below:

We have the import logo from “./logo.svg,” which is importing a picture from a local file somewhere in our directory on the left. Then later on you can just put the words “logo” into your code instead of a super long string.
We also have an import ‘./App.css’ , and all that is doing is importing the styling folder so you can make it look pretty.
Great fun I know, Next.
We have a functional component that houses everything we need to make a page show up on the browser.
Fun fact: There are two components in react, they are functional and class components. The functional component will make your life easier and most likely be the one you use most. SO, If you want to learn more, go here . I use mostly functional components with hooks but, you might have to use both at times.

Let's talk about some basic HTML markup here briefly in App.js, We have a <div></div> that surrounds everything, all this is like a container holding all the other information; they slapped it with a className = “App” for CSS purposes( If you want to learn more about HTML go here. I will be doing a HTML/CSS series very soon will leave links somewhere.)
next, we have a <header></header> tag. You can use that for a logo or a phrase of some kind when you go into sights. (REALLY if you don't know HTML, go here).

After that, we have a <img/> tag (it is self-closing tag, see that slash at the end of it? you don't need to have a separate </img> to close it like most of the HTML). Image tags are always accompanied with an “src= file name ”(I told you that “logo” name can be imported anywhere, it’s usually a URL or in our case, from a file somewhere else) className=” App-logo”(most likely used for CSS styling reasons), and then the alt=””(this is also always accompanied in an img tag, kinda like a placeholder if image link doesn't work.)

Right after that, we have a <p></p> tag or a paragraph HTML tag; we can put anything we want in there since it's mostly just text 90% of the time.
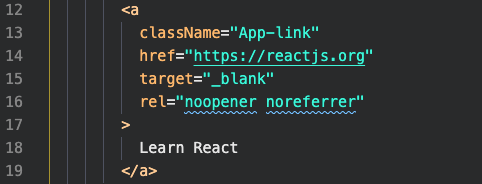
Lastly we have a <a></a> tag or anchor tag. All this does is make a clickable link, over any word you want. usually has href=”site-name”, then a target=”_blank” rel=”noopener noreferrer” (This is extra info but, both of those make it, so another tab opens up instead of redirecting your user to a different site completely.)
One more important thing, see the export default App; at the bottom? That's so if we wanted to use this component in another component, we would be able to. By using export your now able to use this section with import keyword from the very top.
Ok, that's it for now. Hope you learn something new. I will be going on with this tutorial and posting up links as we go along.
check out some javascript….
Javascript 1 (variables and data types)
Javascript 2 (numbers and strings)
Javascript 3 (bracket notation and 20 diff string methods)
Javascript 4 (functions and how they work)
Javascript 5 (hoisting, comparison operators, and if-else statements)
Javascript 6 (diff. Equal signs, null, and undefined)
Javascript 7 (logical operator, &&, || and ternary operators)
Javascript 8 (switch statements and arrays)
Javascript 9 (10 commonly used arrays in javascript)
Javascript 10 (8 different Math. methods And parseInt Usage)
Javascript 11 (for loops and nested for loops)
Javascript 12(while loops and for..in and for..of loops)
Javascript 13(8 diff array methods)
Javascript 14(objects and ways to use objects)
Javascript 15(JSON and fetch request)
Javascript 17(strict mode and error handling)
Javascript 18(setInterval/setTimeout and Dates)
React info…
React part 1 (How to start a react app)
React part 2 (components and dynamic values)
React part 3 (Multiple components and small styling)
React part 4 (click events with functions and react dev tools)
React part 5 (link to: useState hook and how to output lists in react)
React part 6 (Props and reusable components)
React part 7 (passing functions as props and use effect hook)
React part 9 (Fetching data with JSON)
React part 10 (loading bar and fetch errors)
React part 12(React Router Dom, Exact, and Links)
The Social Media…
